This post contains affiliate links. When you purchase a product through one of the links, we get a small commission at no extra cost to you. For more information, see our disclosures page and thanks for supporting the blog!
I’m not an interior designer – but for better or worse – I play one at home. So when my living room needed repainting, and I opted to go with a completely new color scheme, I took the opportunity to revamp my mantel as well. My thinking was – it’s basically a shelf with some wall space above it to fill – how hard could it be? Turns out there is a fine art to displaying “objets”, and creating an attractive vignette took more trial and error than I thought. I enlisted Lisa’s help during the process as she has an infinitely better eye than I do, and received some invaluable advice. Along the way, I did some painting to update a few existing pieces and got crafty customizing my lampshades. In the end, I am pleased with the result and would love to hear what you think.
Here is where I started
I mentioned in an earlier post that my default color of choice is yellow – all shades. The mantel is in a living room that is part of a larger living room – dining room combo that I had painted shades of the same yellow – lighter in the living room and a bit darker in the dining room for mood. The room was painted last Fall before I started the blog, so unfortunately I don’t have a true before picture. But this is what I started with after the walls were done a pale blue called Horizon (Benjamin Moore).
The original sconces which I swapped out last year were brass builder specials from a big box store. And the new sconces here that looked black on line actually had an “antique bronze” finish that read brown in person. A quick spray of matte black paint remedied that – again this was done last Fall.
Mirror
The first thing I knew I wanted to do was to update the shiny gold mirror. I decided I would go with the same matte black I used for the sconces. After giving the mirror a good cleaning, I taped the glass to prevent it from getting painted and sprayed away.
Truth be told, despite my taping, I did get overspray on the glass, but a little Windex cleaned it right up.
I was happy with the result and after letting it dry, hung it back up in its original spot above the mantel.
Lampshades
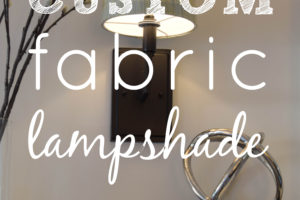
I loved the drum shade on the new sconces; it was one of the main reasons I picked them. But, the bright white shade clashed with my ivory curtains and off-white trim and mantel. They stuck out like a sore thumb and needed to change. I had some extra fabric from two chairs I had reupholstered and decided I would cover the shades with it. I took a swatch from each of the two fabrics in question and used painter’s tape to temporarily attach it to the shades. Then I put the shades up and made my choice – I went with this tweed (from Calico) that I had purchased to recover the lumbar pillows on my slipper chairs.
I’ve covered lampshades in fabric before where I have tucked the fabric over the top and under the bottom of the shade to create the “finished edge”. But in this case, I opted not to do that because the lampshade frame sat right at the bottom of the shade and I would have had to make cuts in the fabric to work around it. So I cut the fabric to size – just to cover the face of the shade – and ironed a quarter inch hem on the top, bottom and one side to create a finished edge. Using Elmer’s Craft Bond spray adhesive, I secured the hems. After gluing, I had a long rectangle with one unfinished edge, ready to be attached to the shade.
Next, I attached the fabric to the shade. For the first shade, I sprayed both the back of the fabric as well as the shade and found that this was unnecessary and even made it harder to attach the fabric. The second time around, I only sprayed the fabric and found this much easier. Starting with the unfinished edge, I rolled the fabric onto the shade covering the unfinished edge with the finished one at the end. It was easy to attach when I went slowly to make sure my fabric lined up with the shade edges. The fabric adhered quickly and smoothly and I am now thinking of other projects where I can make use of the spray glue.
Decor
With the main elements in place, I needed to turn to the decor. The first two steps were straightforward for me – I knew what I wanted to do and did it. For this step, my confidence waned – I did not have a “vision” of what should go on the mantel. I just knew the general style would be business casual for my formal-ish living room. Then, because I know what I like when I see it, I did what most of us do and turned to Pinterest for some inspiration. There I found a couple of good primers on mantel styling (you can find them here and here) that gave me some basics, like the need for an anchor (my mirror) some height on one or both sides and filler pieces that tie everything together.
Next, I put one of Lisa’s processes (she uses it in this post) to good use when thinking about how to decorate the mantel and placed everything I was contemplating – old and new – on the coffee table in the living room. I found this helpful because it forced me to go around the house and consider anything that might find a home on the mantel. I didn’t fuss too much over whether it was the perfect piece, but rather grabbed anything that might possibly work. After I saw what I could rustle up at home, I made a trip to HomeGoods to gather other complementary pieces.
Then with everything in front of me and a blank mantel, I used trial and error to place the pieces – keeping in mind the basic tenets I had learned about mantel styling from my research. This video, from the Martha Stewart archives, really resonated with me – not so much for the style but for the process – and for the fact that the designer – like me – thinks less is more. I did as she suggested and placed a piece, took a step back and decided whether it worked or not. There were many, many iterations of this. When I took it as far as my skills would take me, I snapped some pics and sent them over to Lisa for fine-tuning. As always, she had great suggestions that took the final product from meh to marvelous (at least to me!).
Decor sources left to right: Apothecary jar (similar), Mercury Glass Votives, Stockholm Bowl, Hear No Evil Monkey (HomeGoods), White Bowls (Curated), Pussy Willows, Silver Orb (HomeGoods), Sconces
Kristen


