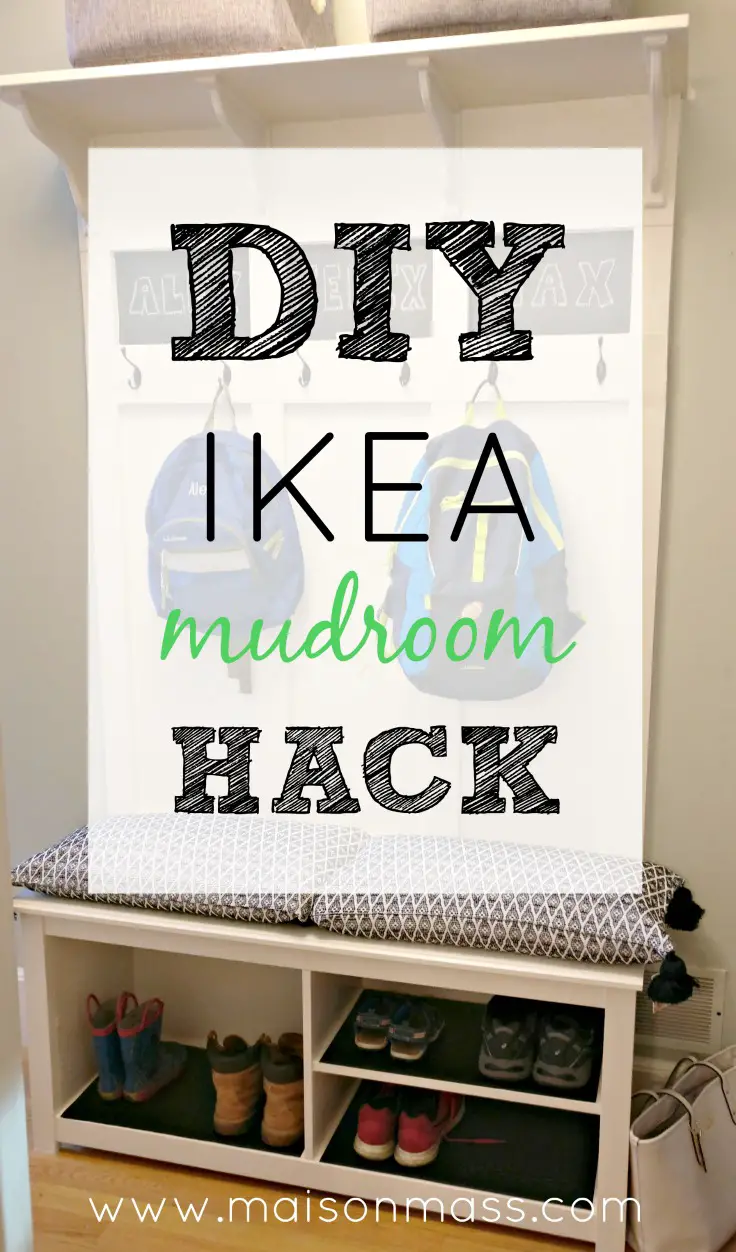
I have a huge case of mudroom envy. I live in a Colonial house built in the pre-mudroom era. It has one small hall closet that houses our family of five’s winter jackets and not much more. With three school age boys dropping coats, backpacks and shoes all over my kitchen every day, I’ve been desperate for a solution. This year I finally decided to solve my issue by creating a mudroom “area” in our front hallway – the main thoroughfare for entering and leaving our house. I appealed to my husband, showing him my ideas and inspiration. He was skeptical, knowing that building something would mean a new honey-do list for him, but reluctantly signed on for this DIY Ikea mudroom hack!
This post contains affiliate links. When you purchase a product through one of the links, we get a small commission at no extra cost to you. For more information, see our disclosures page and thanks for supporting the blog!
So we started brainstorming ways we could achieve what we wanted with minimal time and effort: enter IKEA. We are no strangers to the Scandinavian superstore, but this time we were focused on pieces that we could incorporate into a final design that looked less dorm room and more built-in. We looked at IKEA’s website and sufficiently encouraged and with some rough measurements in hand, traveled the hour to our closest IKEA to look for a TV console that could be used as a bench and a shelf to hang above. There are certainly many TV stands that would work well, but for our small space our options were limited. I wanted something narrow that would not protrude into the hallway more than necessary and the BRUSALI TV unit proved our best option. We paired that with the EKBY HEMNES shelf which is no longer available but is similar in dimension to the BERGSHULT shelf with a couple of extra brackets and we were on our way.
But before we got into any of the fun stuff, two things needed to be dealt with: (1) the giant white doorbell needed to go and (2) we needed to cut out a piece of baseboard so that the TV stand cum bench could fit flush to the wall. After researching our options, we decided to to buy a wireless doorbell since we could put the bell itself in any outlet we wanted to in the house. This got it off my hallway wall to make room for my mudroom built-in and had the added bonus of two plug-in receivers (one we put in the finished basement where we were never able to hear the doorbell before) and 52 melodies we can choose from if we want something more festive at the holidays, for example.
With that out of the way, my husband set to work on removing the baseboard. Our baseboard is a two-piece moulding and not the speedbase commonly used today so we had to remove both pieces. Using his multi-tool, he cut two lines in the baseboard and then we set about carefully prying the top moulding off and then the baseboard itself.
It was a job that required some strength and a little more finesse than we originally would have thought. Using a crow bar and a block of wood to protect the wall behind by distributing the pressure evenly, we were finally able to remove the section without damaging the rest of the baseboard or the drywall behind.
With the baseboard out of the way, we put the BRUSALI unit we were using as a bench into place and decided to cut the legs of it down to make it bench height. Then we replaced it and started measuring out the trim that would create the built-in look and also be the platform for shelf brackets and the coat hooks. Luckily we had some wood leftover from other projects that was just the right size for our needs. The top piece where the shelf sat is 8 1/2″ high and the smaller horizontal board for the hooks is 4 1/2″ high.
The vertical trim pieces are 2 5/8″ wide and line up with each shelf bracket, creating the three distinct spaces for each of our sons.

After all of the trim was in place, we added the shelf and brackets to complete the built-in structure. Then it was time for some puttying, caulking and sanding to prepare for paint.
Once everything was sanded and smooth and ready to go, I painted everything (including the walls so it would look like one whole unit) the same color as the rest of the trim in my house, Benjamin Moore Navajo White. It ended up taking three coats before I was happy with the finished result. And when that dried, I took some chalkboard paint and painted the small boxes between the shelf and hooks to personalize the space for the boys.
I wanted the hooks to be black, but found a great deal on oil rubbed bronze numbers that looked black online and I knew from my mantel project, I could just hit them with some black spray paint if they weren’t dark enough.
And, indeed, when I did open the package they were more bronze than I wanted, so I gave them (and the screws that came with them) a quick spray and was happy with the result.
The original TV console had two shelves on either side of the unit that we wanted to use for shoe storage. In the end we only used one of the shelves to make room for boots on the left side. To protect the bench from the inevitable dirty, wet footwear it was destined to house, I bought some black shelf liner that has Clorox in it to prevent mold and mildew. It will be easy to wipe away any dirt and keep the bench area neat and clean.
In the end, I am pleased with my DIY Ikea mudroom hack and more importantly, the kids are thrilled to have a dedicated space for their stuff. Already this morning, I was able to point to the bench when asked “where are my shoes?” thirty seconds before the bus was scheduled to arrive. My heart felt full.
Has it eliminated all of my mudroom envy? In a word, no. There are some measurements I would tweak if I was doing it again – like lowering the shelf down a bit and maybe increasing the size of the chalkboards. And I still need to get a real cushion for the bench, but overall I think it looks good, cost us only about $100 and gives us the drop zone we needed!
Kristen


